- Published on
Tutorial: Deploying Uniswap V2 to Asset Hub PolkaVM
Language: English
Author: Dustin
Level: Beginner
✅ Prerequisites
Before you begin, you need to have tokens on the appropriate network.
-> Supported Networks
| Network | Type |
|---|---|
| Kusama Asset Hub | Mainnet |
| Passet Asset Hub | Testnet |
Optional: If you want to deploy to Passet Asset Hub
You can get free testnet tokens from the official Polkadot faucet: https://faucet.polkadot.io/?parachain=1111
Optional: If you want to deploy to Kusama Asset Hub (Mainnet)
This tutorial will help you how to get KUS PolkaVM from KUS native asset on Kusama Asset Hub.
💡 Tip: Getting KUS on Asset Hub The KUS you need is the native asset of the Kusama Asset Hub, not the KSM from the Relay Chain. If you have KSM on the Relay Chain, you can use an XCM tool like the ParaSpell Playground to transfer it to Asset Hub.
Step 1: Bridge Native KUS to PolkaVM (EVM)
To pay for gas and interact with smart contracts, you must move your native KUS balance to the PolkaVM. This is a two-part process.
1.1. Map Your Substrate Account to an EVM Account
First, create an association between your Substrate-based account and your EVM address.
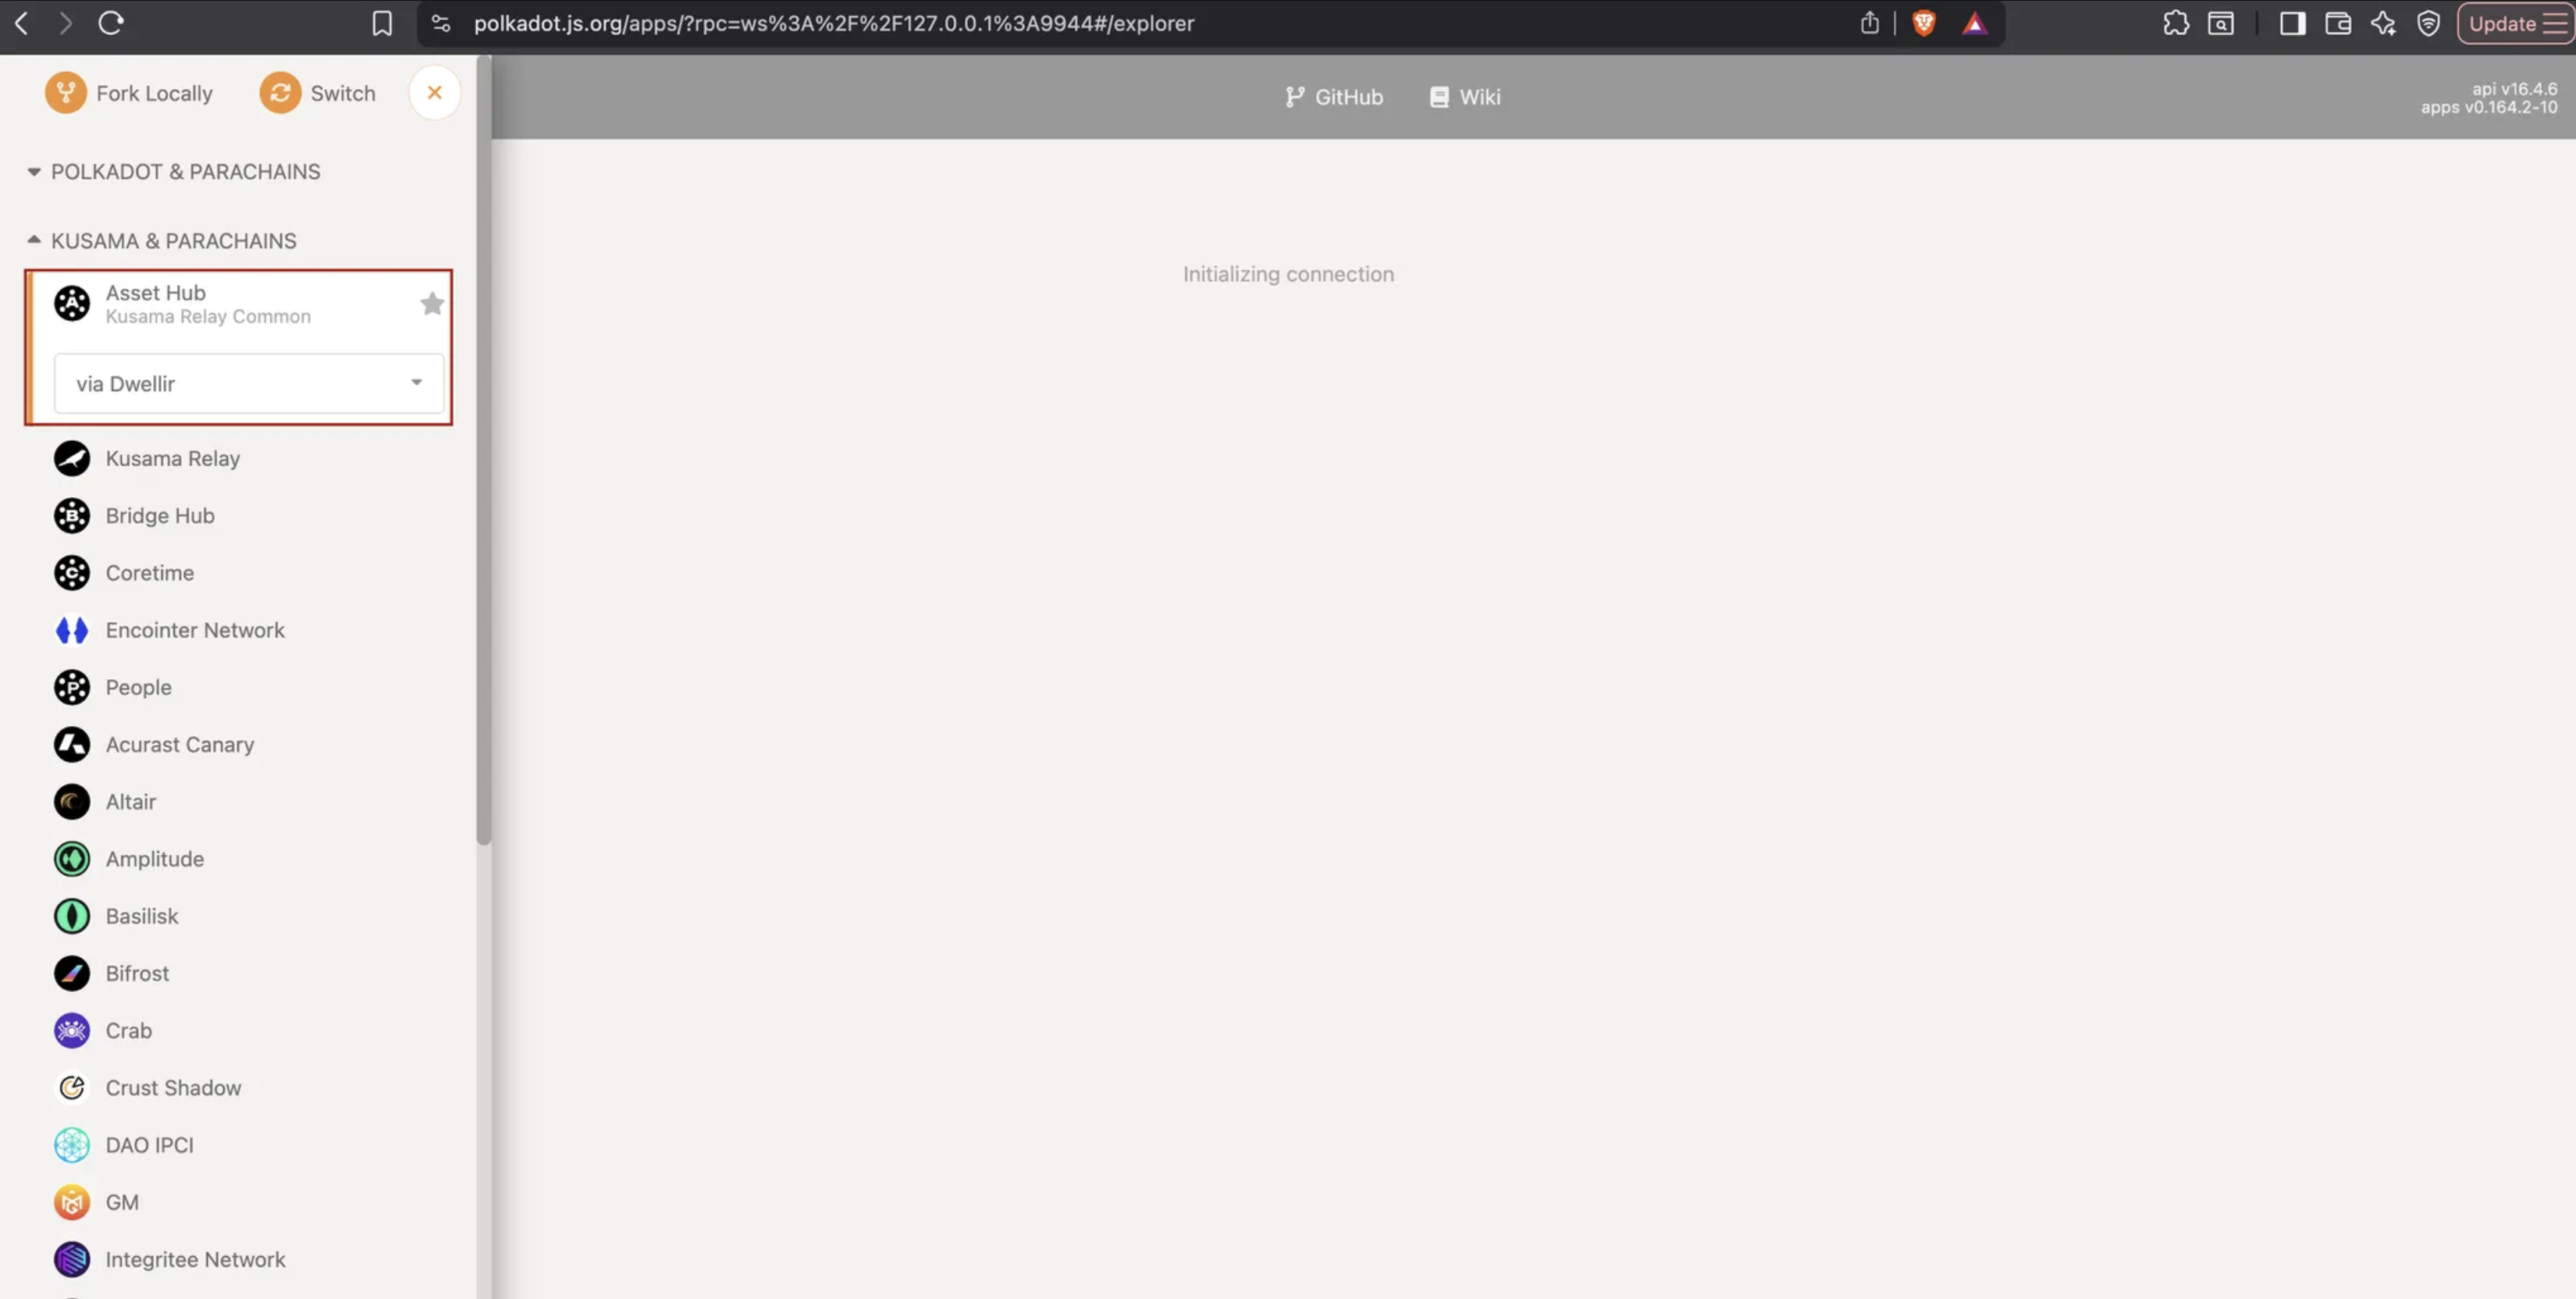
- Go to Polkadot-JS Apps and connect to the Kusama Asset Hub network.
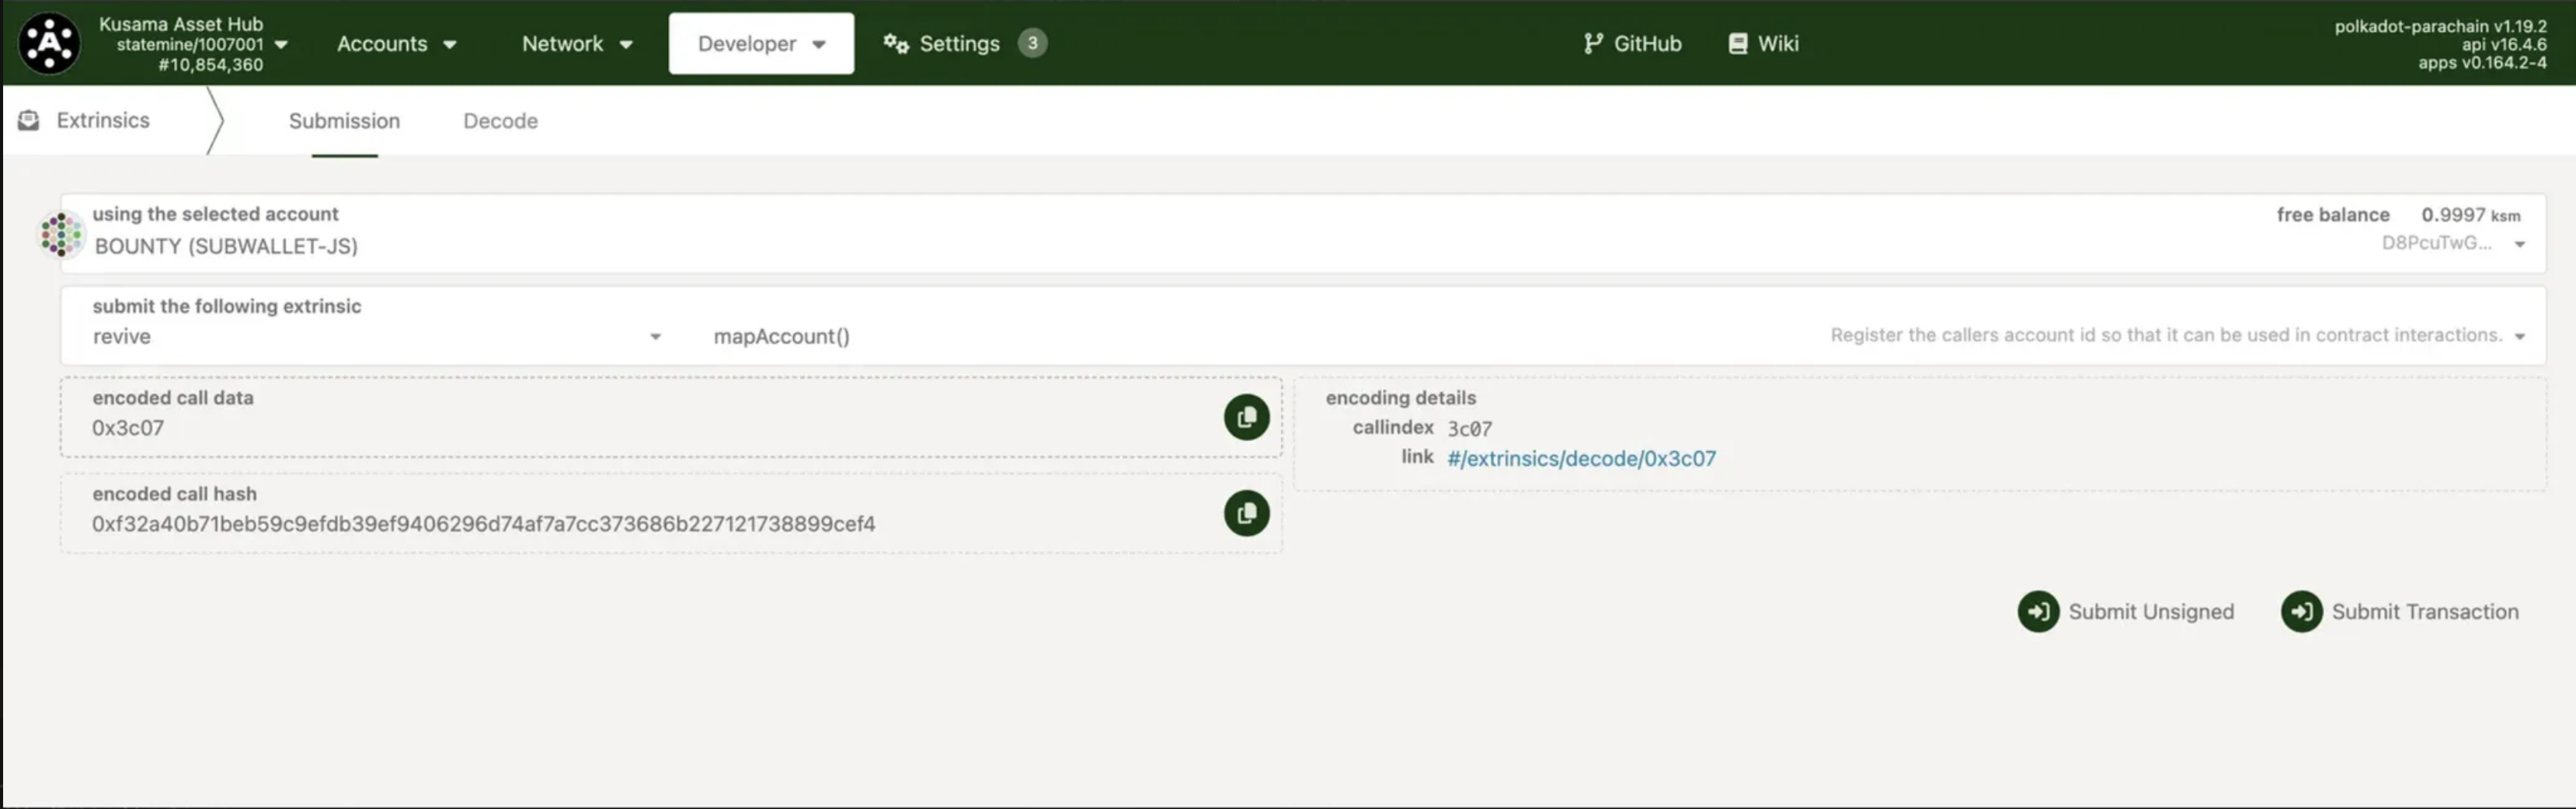
- Navigate to Developer > Extrinsics.
- Submit the extrinsic:
revive.mapAccount().
1.2. Transfer Native KUS to Your EVM Balance
Next, transfer the funds from your native balance to your newly mapped EVM balance.
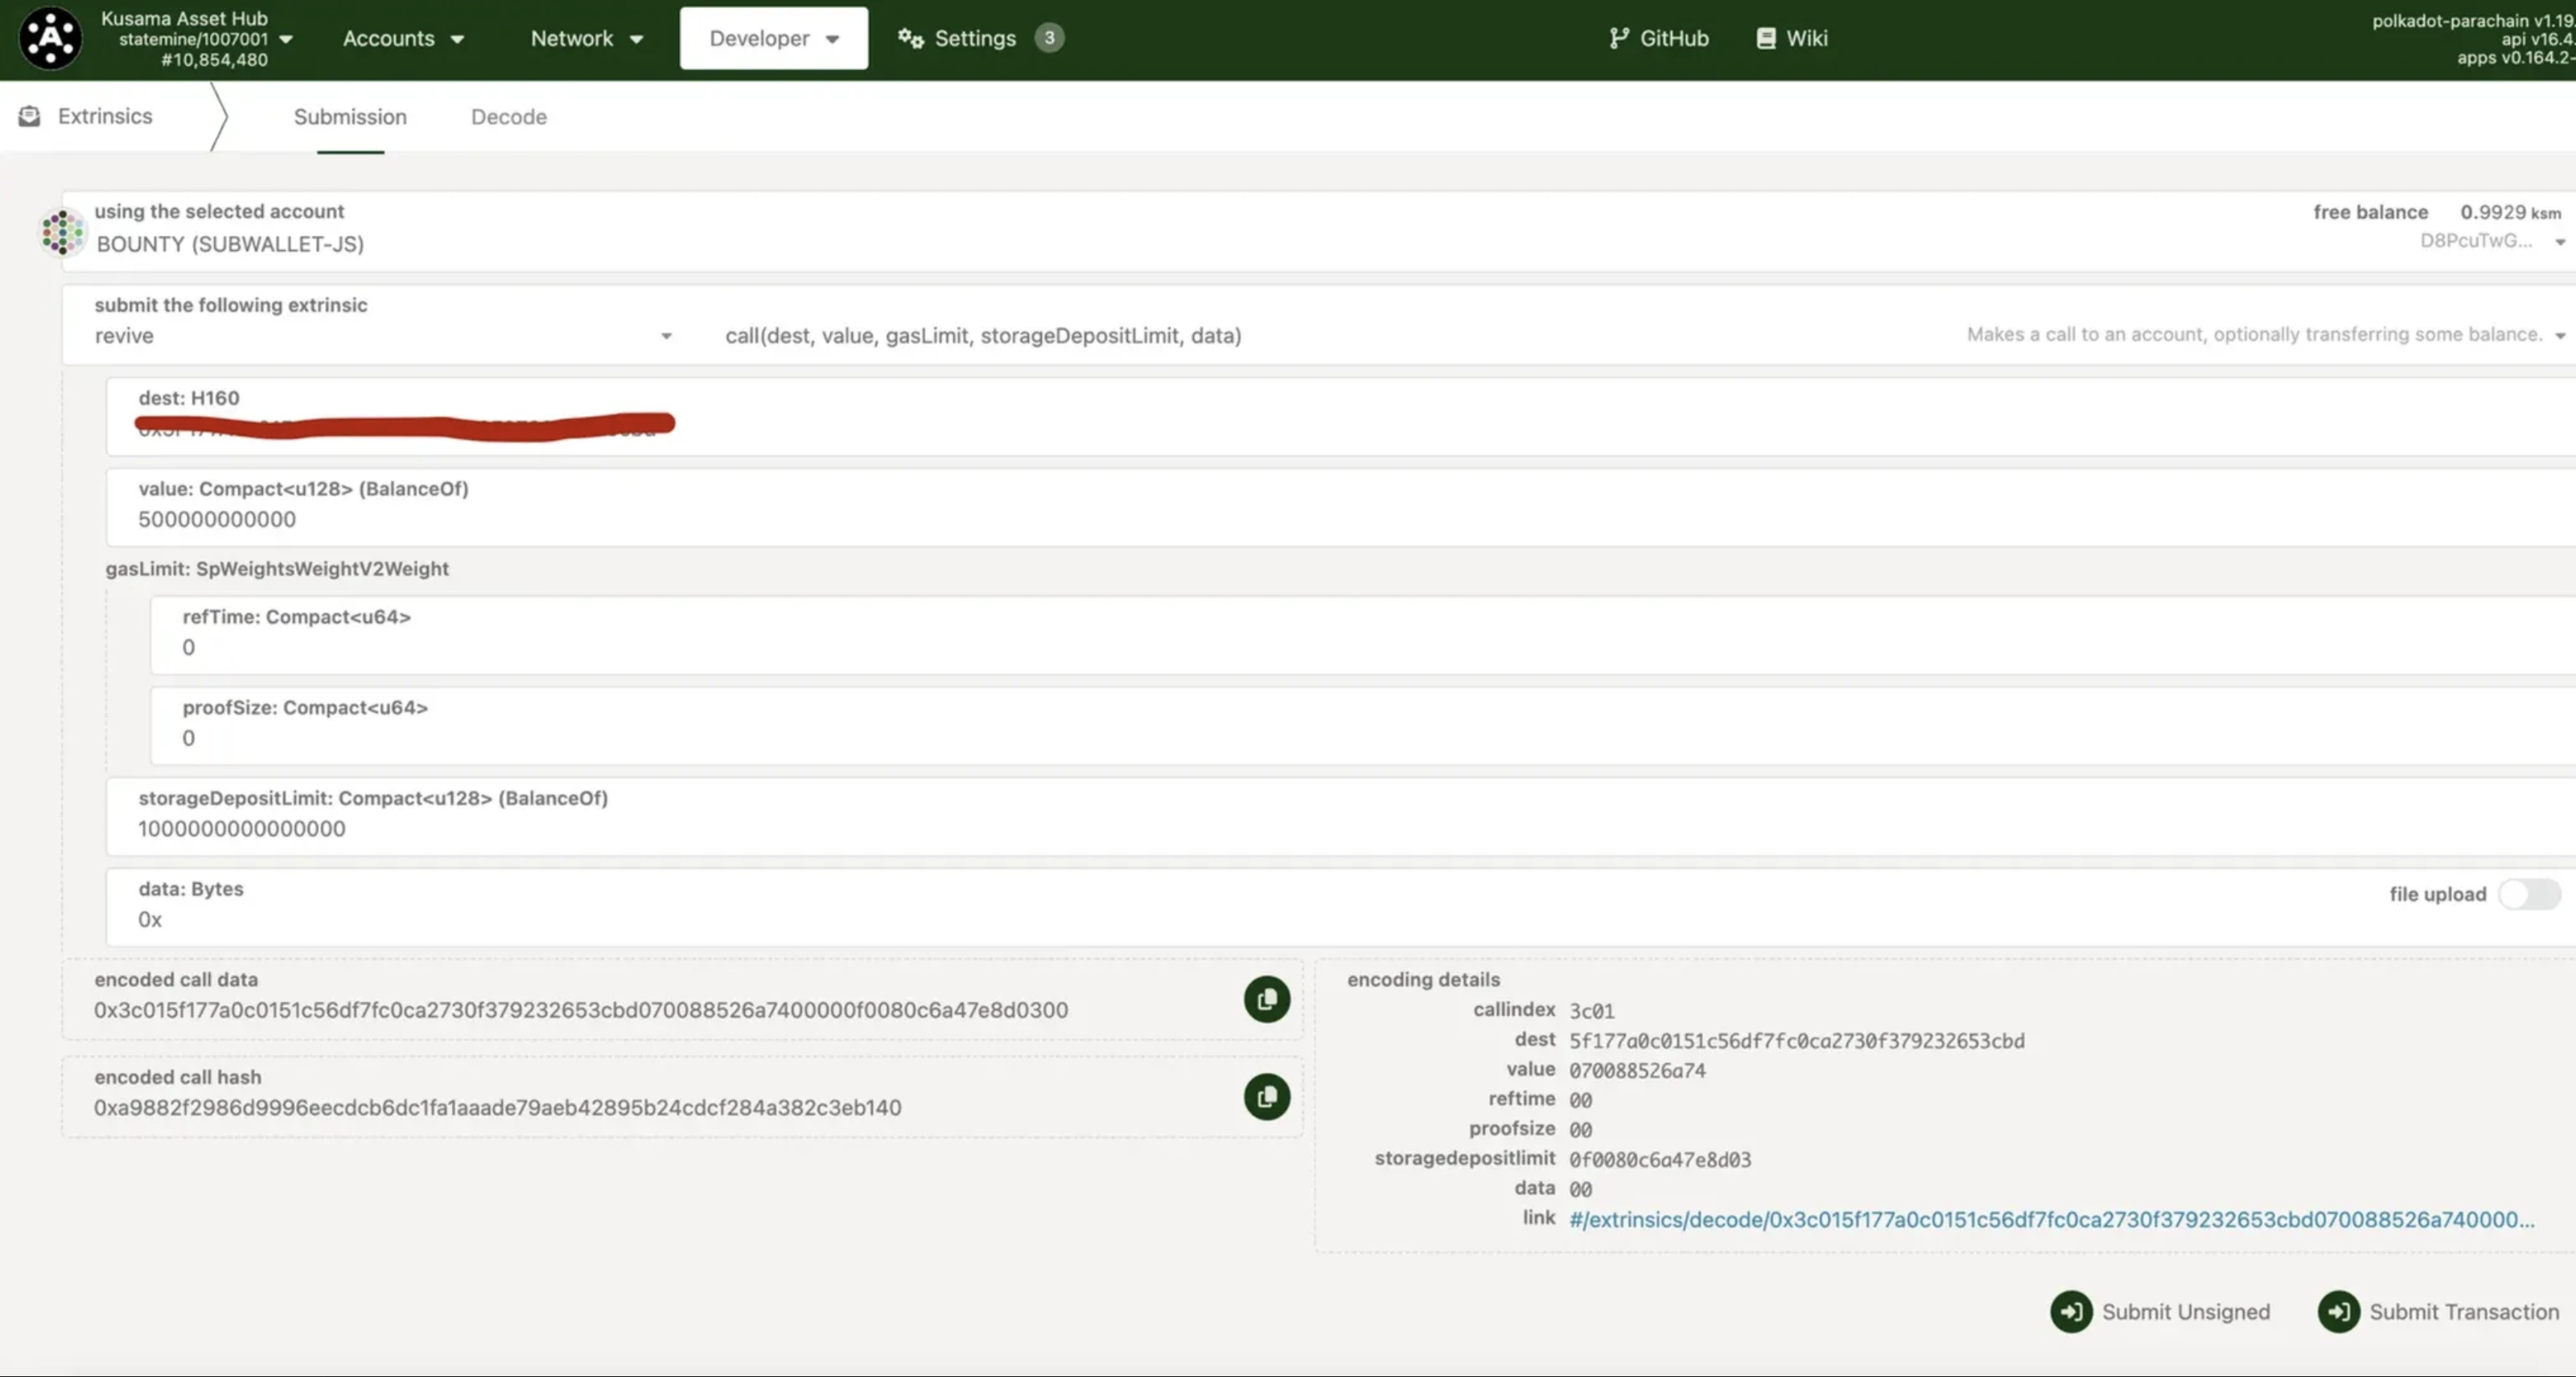
- Navigate to Developer > Extrinsics.
- Submit the extrinsic:
revive.call()with the following parameters:
| Parameter | Value | Example |
|---|---|---|
dest | Your ETH address | 0x... |
value | Amount in Wei | 500000000000 |
storageDepositLimit | Gas limit | 1000000000000000 |
data | Calldata | 0x |
Step 2: Verify Your EVM Balance
Confirm that your funds have successfully arrived in your PolkaVM account.
- Option A: Use an RPC Call
You can query your balance directly using the public RPC endpoint.
curl -X POST -H "Content-Type: application/json" \
--data '{"jsonrpc":"2.0","method":"eth_getBalance","params":["<YOUR_EVM_ADDRESS>", "latest"],"id":1}' \
https://kusama-asset-hub-eth-rpc.polkadot.io
- Option B: Use a Block Explorer
Check your account on Subscan's EVM explorer: https://assethub-kusama.subscan.io/account/<YOUR_EVM_ADDRESS>
Set Up Your Deployment Project
Now, let's prepare the Uniswap V2 smart contracts for deployment.
Clone the example repository:
git clone https://github.com/CocDap/uniswap-v2-polkavm
cd uniswap-v2-polkavm
Configure your environment:
cp .env.example .env⚠️ Important: Open the new
.envfile and add the private key for the EVM account you funded in Step 1.Install dependencies:
npm install
**💡 Important: The project already configured
Passet Asset HubandKusama Asset Hubonhardhat.config.js**
Compile and Deploy the Smart Contracts
We will now compile the contracts and deploy them one by one using Hardhat.
Compile the Contracts
npx hardhat compile
You will see some warnings, which are expected. The key is the Successfully compiled message at the end.
Compiling 12 Solidity files
Warning: Visibility for constructor is ignored. If you want the contract to be non-deployable, making it "abstract" is sufficient.
 --> contracts/test/ERC20.sol:7:5:
  |
7 |     constructor(uint256 _totalSupply) public {
  |     ^ (Relevant source part starts here and spans across multiple lines).


Warning: It looks like you are using 'ecrecover' to validate a signature of a user account.
Polkadot comes with native account abstraction support, therefore it is highly recommended NOT
to rely on the fact that the account has an ECDSA private key attached to it since accounts might
implement other signature schemes.

--> contracts/UniswapV2ERC20.sol

Successfully compiled 12 Solidity files
Deploy the ERC20 Token Contract
npx hardhat ignition deploy ignition/modules/UniswapV2ERC20.js --network <passetHub or kusamaHub>
Result: A new ERC20 token contract will be deployed. Note the address.
Deploying UniswapV2ERC20Module...
Deploying UniswapV2ERC20 contract...
Hardhat Ignition 🚀

Deploying [ UniswapV2ERC20Module ]

Batch #1
  Executed UniswapV2ERC20Module#UniswapV2ERC20

[ UniswapV2ERC20Module ] successfully deployed 🚀

Deployed Addresses

UniswapV2ERC20Module#UniswapV2ERC20 - 0xDE950Fa08AA869F17028cfA107EEe593124fDe03
Deploy the WETH Contract
npx hardhat ignition deploy ignition/modules/UniswapV2WETH.js --network <passetHub or kusamaHub>
Result: The WETH contract will be deployed.
Batch #1
  Executed UniswapV2WETHModule#WETH

[ UniswapV2WETHModule ] successfully deployed 🚀

Deployed Addresses

UniswapV2ERC20Module#UniswapV2ERC20 - 0xDE950Fa08AA869F17028cfA107EEe593124fDe03
UniswapV2WETHModule#WETH - 0xea2B9312CE3B867AAd92c8fC033C9640b136383b
Deploy the Factory Contract
npx hardhat ignition deploy ignition/modules/UniswapV2Factory.js --network <passetHub or kusamaHub>
Result: The core Uniswap V2 Factory contract will be deployed.
Batch #1
  Executed UniswapV2FactoryModule#UniswapV2Factory

[ UniswapV2FactoryModule ] successfully deployed 🚀

Deployed Addresses

UniswapV2ERC20Module#UniswapV2ERC20 - 0xDE950Fa08AA869F17028cfA107EEe593124fDe03
UniswapV2WETHModule#WETH - 0xea2B9312CE3B867AAd92c8fC033C9640b136383b
UniswapV2FactoryModule#UniswapV2Factory - 0xE4979C8F7f4AC4354304E11B6211ABB3b40Cf1EC
Deploy a Liquidity Pair
npx hardhat ignition deploy ignition/modules/UniswapV2Pair.js --network <passetHub or kusamaHub>
Result: The Factory's createPair function is called, creating a new trading pair.
Batch #1
  Executed UniswapV2PairModule#UniswapV2ERC20
  Executed UniswapV2PairModule#UniswapV2Factory
  Executed UniswapV2PairModule#WETH

Batch #2
  Executed UniswapV2PairModule#UniswapV2Factory.createPair

[ UniswapV2PairModule ] successfully deployed 🚀

Deployed Addresses

UniswapV2ERC20Module#UniswapV2ERC20 - 0xDE950Fa08AA869F17028cfA107EEe593124fDe03
UniswapV2WETHModule#WETH - 0xea2B9312CE3B867AAd92c8fC033C9640b136383b
UniswapV2FactoryModule#UniswapV2Factory - 0xE4979C8F7f4AC4354304E11B6211ABB3b40Cf1EC
UniswapV2PairModule#UniswapV2ERC20 - 0xDE950Fa08AA869F17028cfA107EEe593124fDe03
UniswapV2PairModule#UniswapV2Factory - 0xE4979C8F7f4AC4354304E11B6211ABB3b40Cf1EC
UniswapV2PairModule#WETH - 0xea2B9312CE3B867AAd92c8fC033C9640b136383b
🎉 Congratulations & Next Steps
You have successfully deployed a full Uniswap V2 instance to Asset Hub! This process demonstrates how to deploy any Solidity smart contract to PolkaVM.
Your next steps could be:
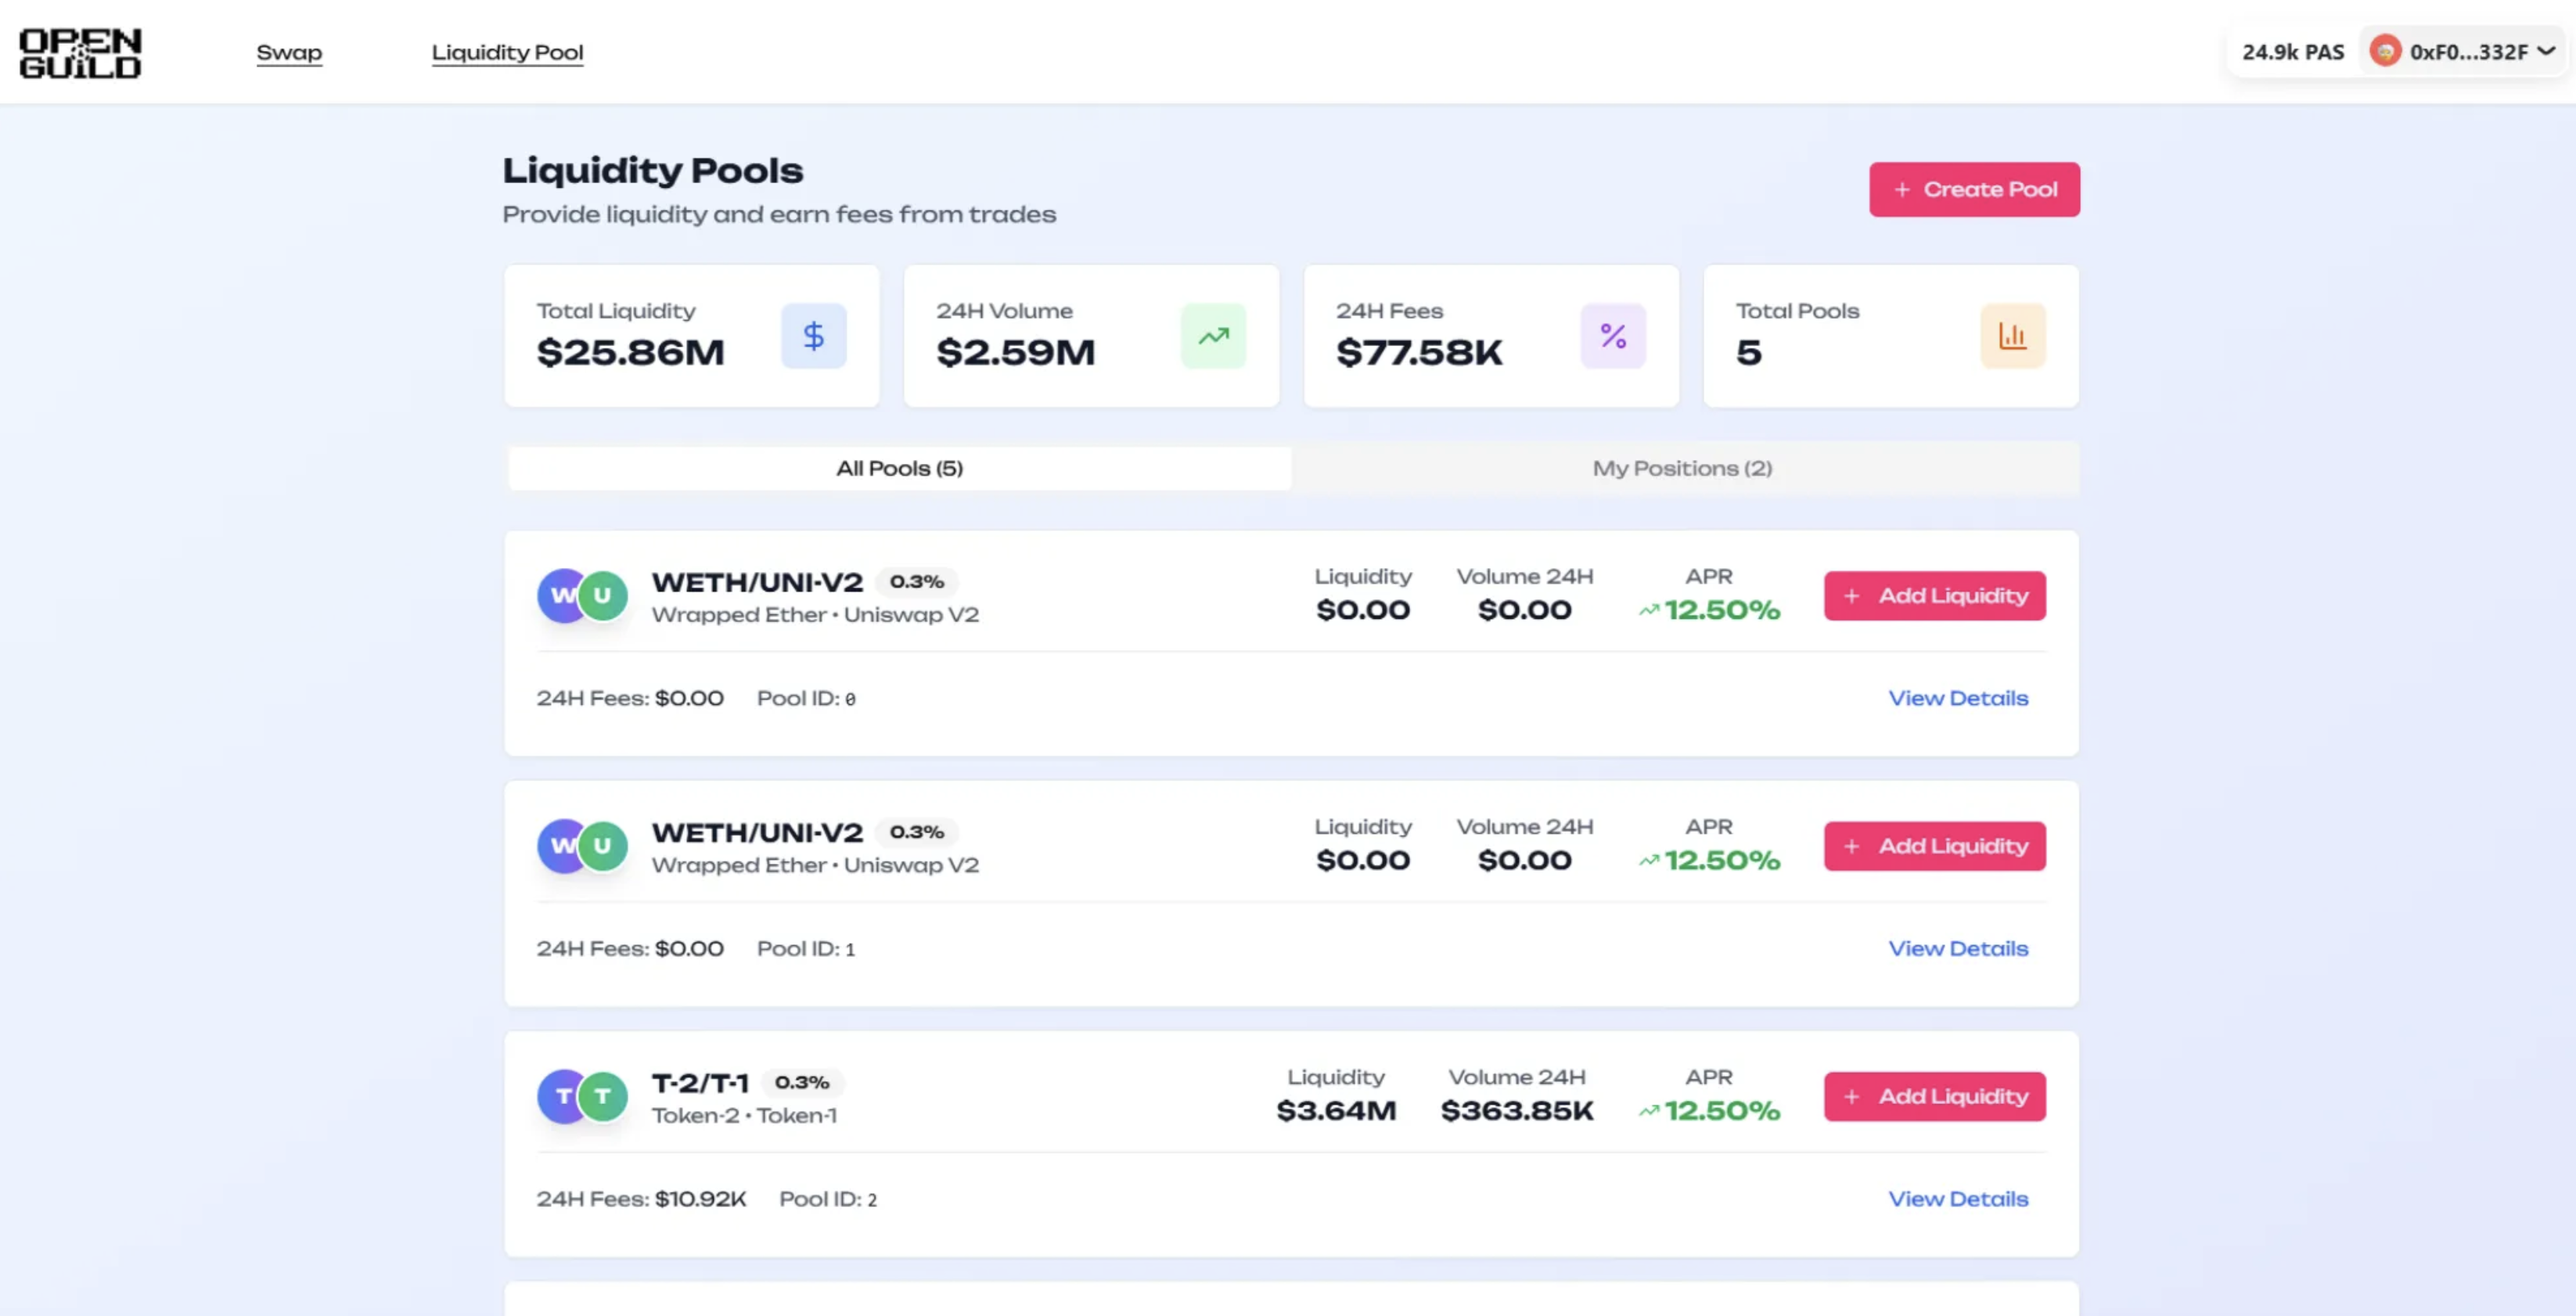
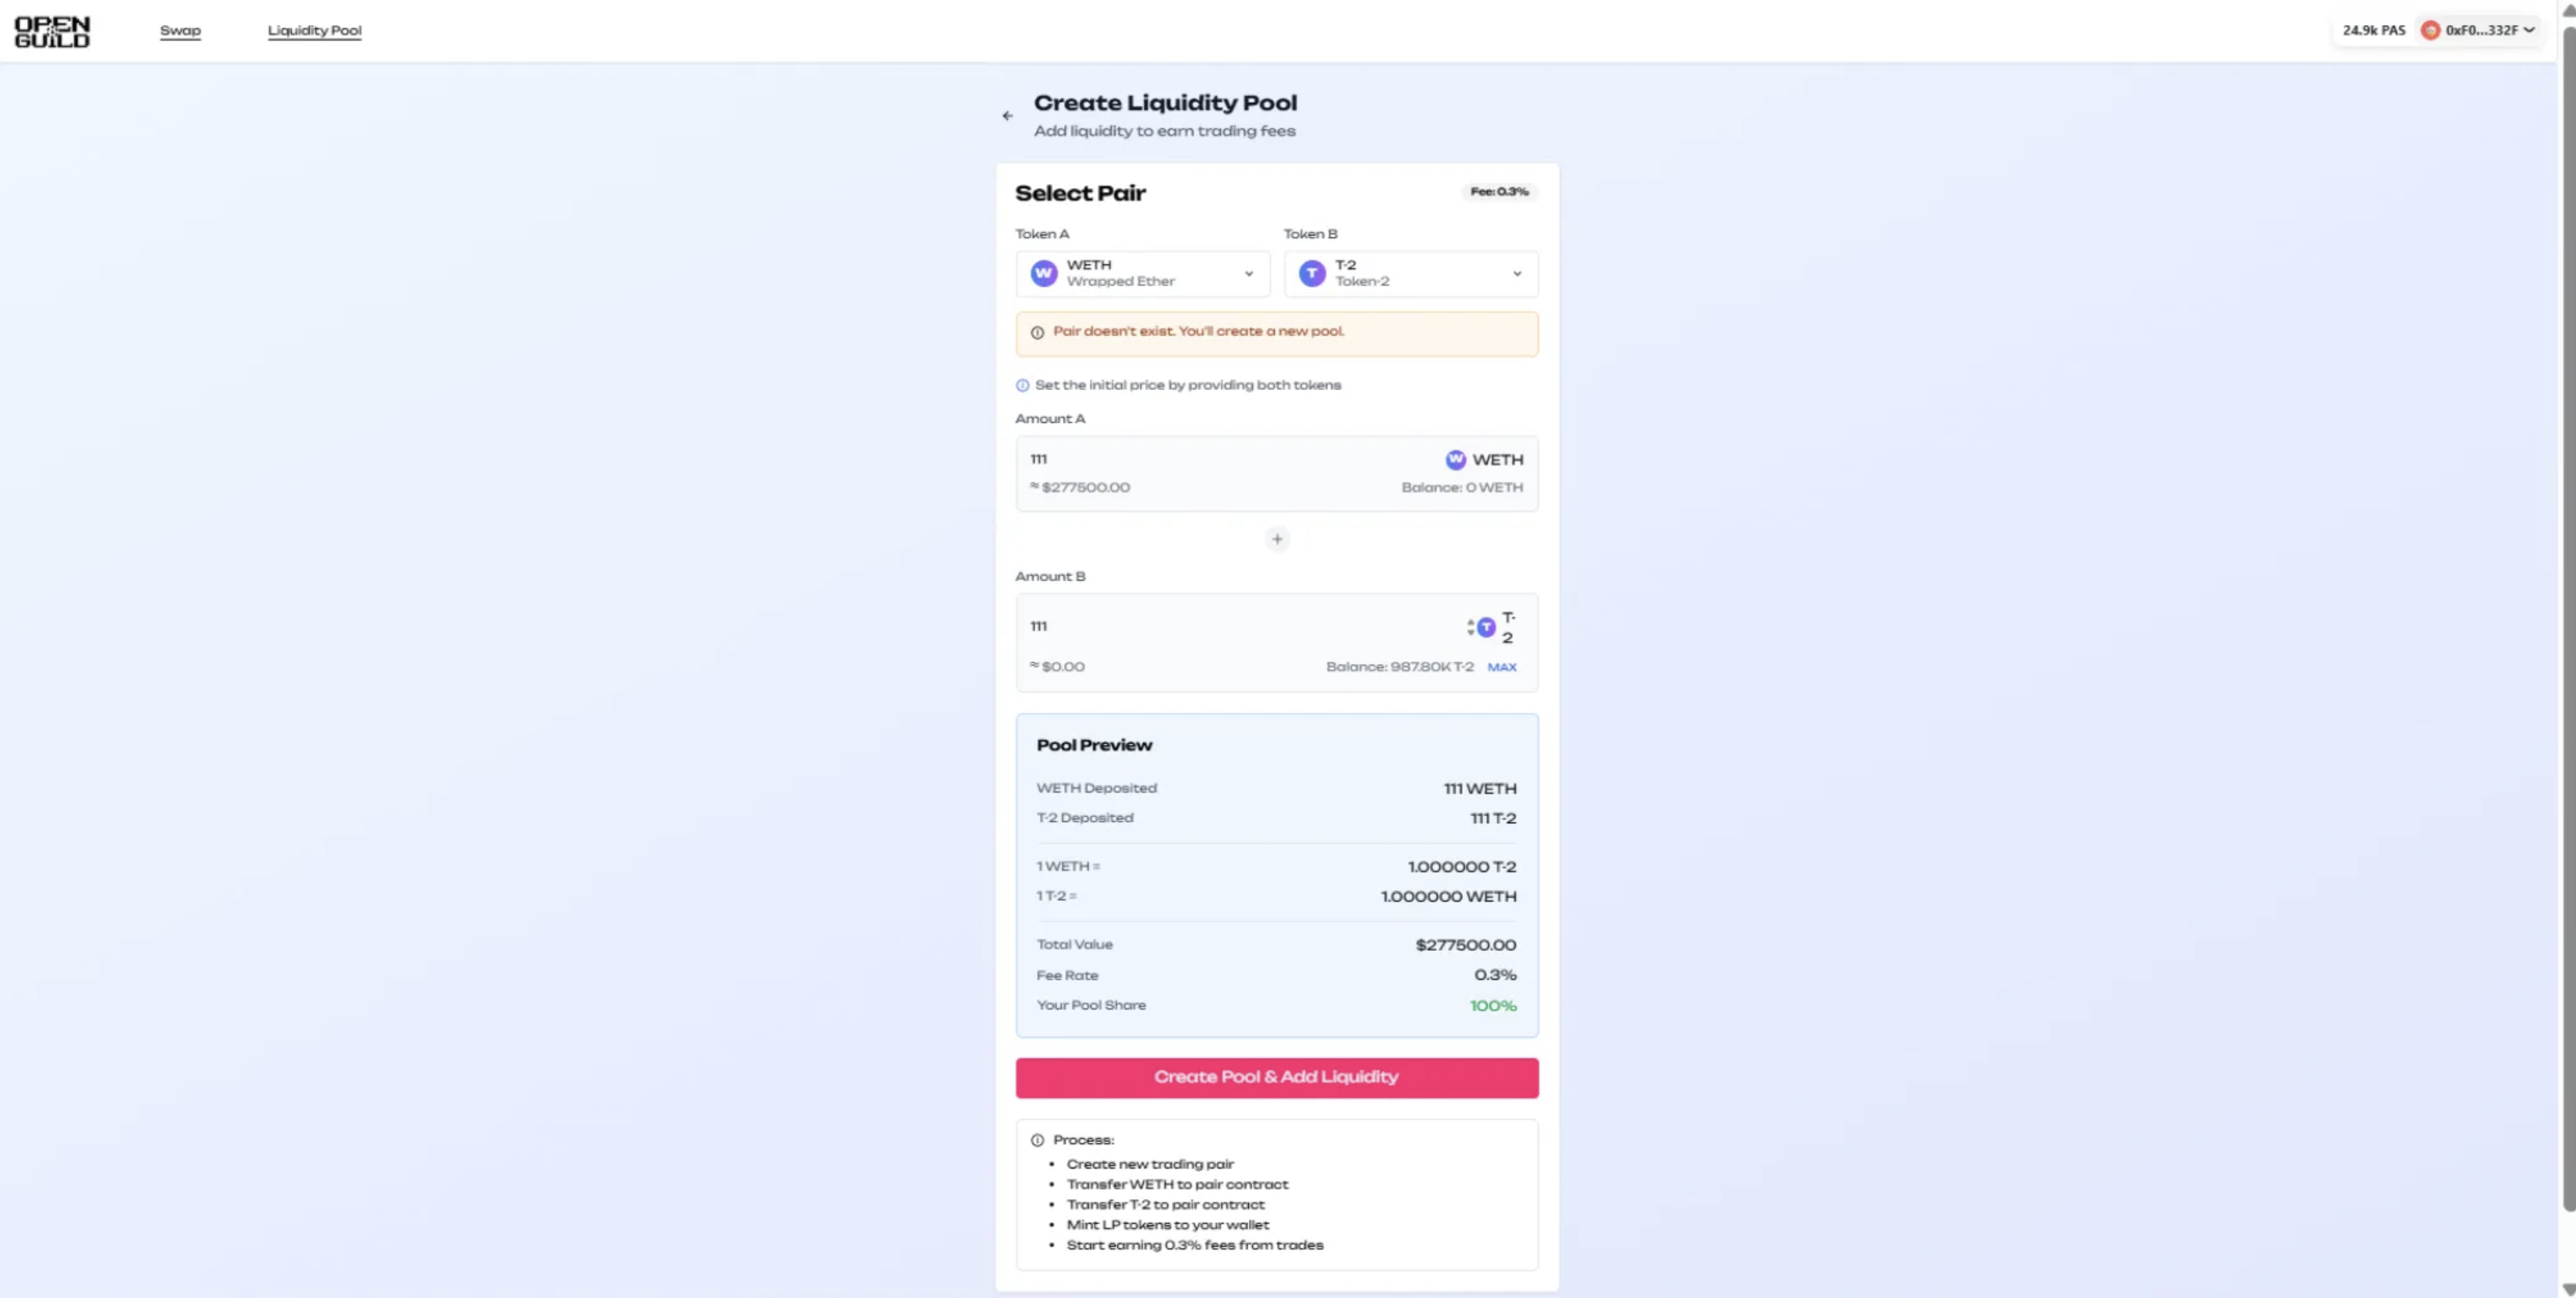
Build a User Interface: Create a front-end to interact with your deployed contracts.
Provide Liquidity: Create new pairs and add funds to your liquidity pools.
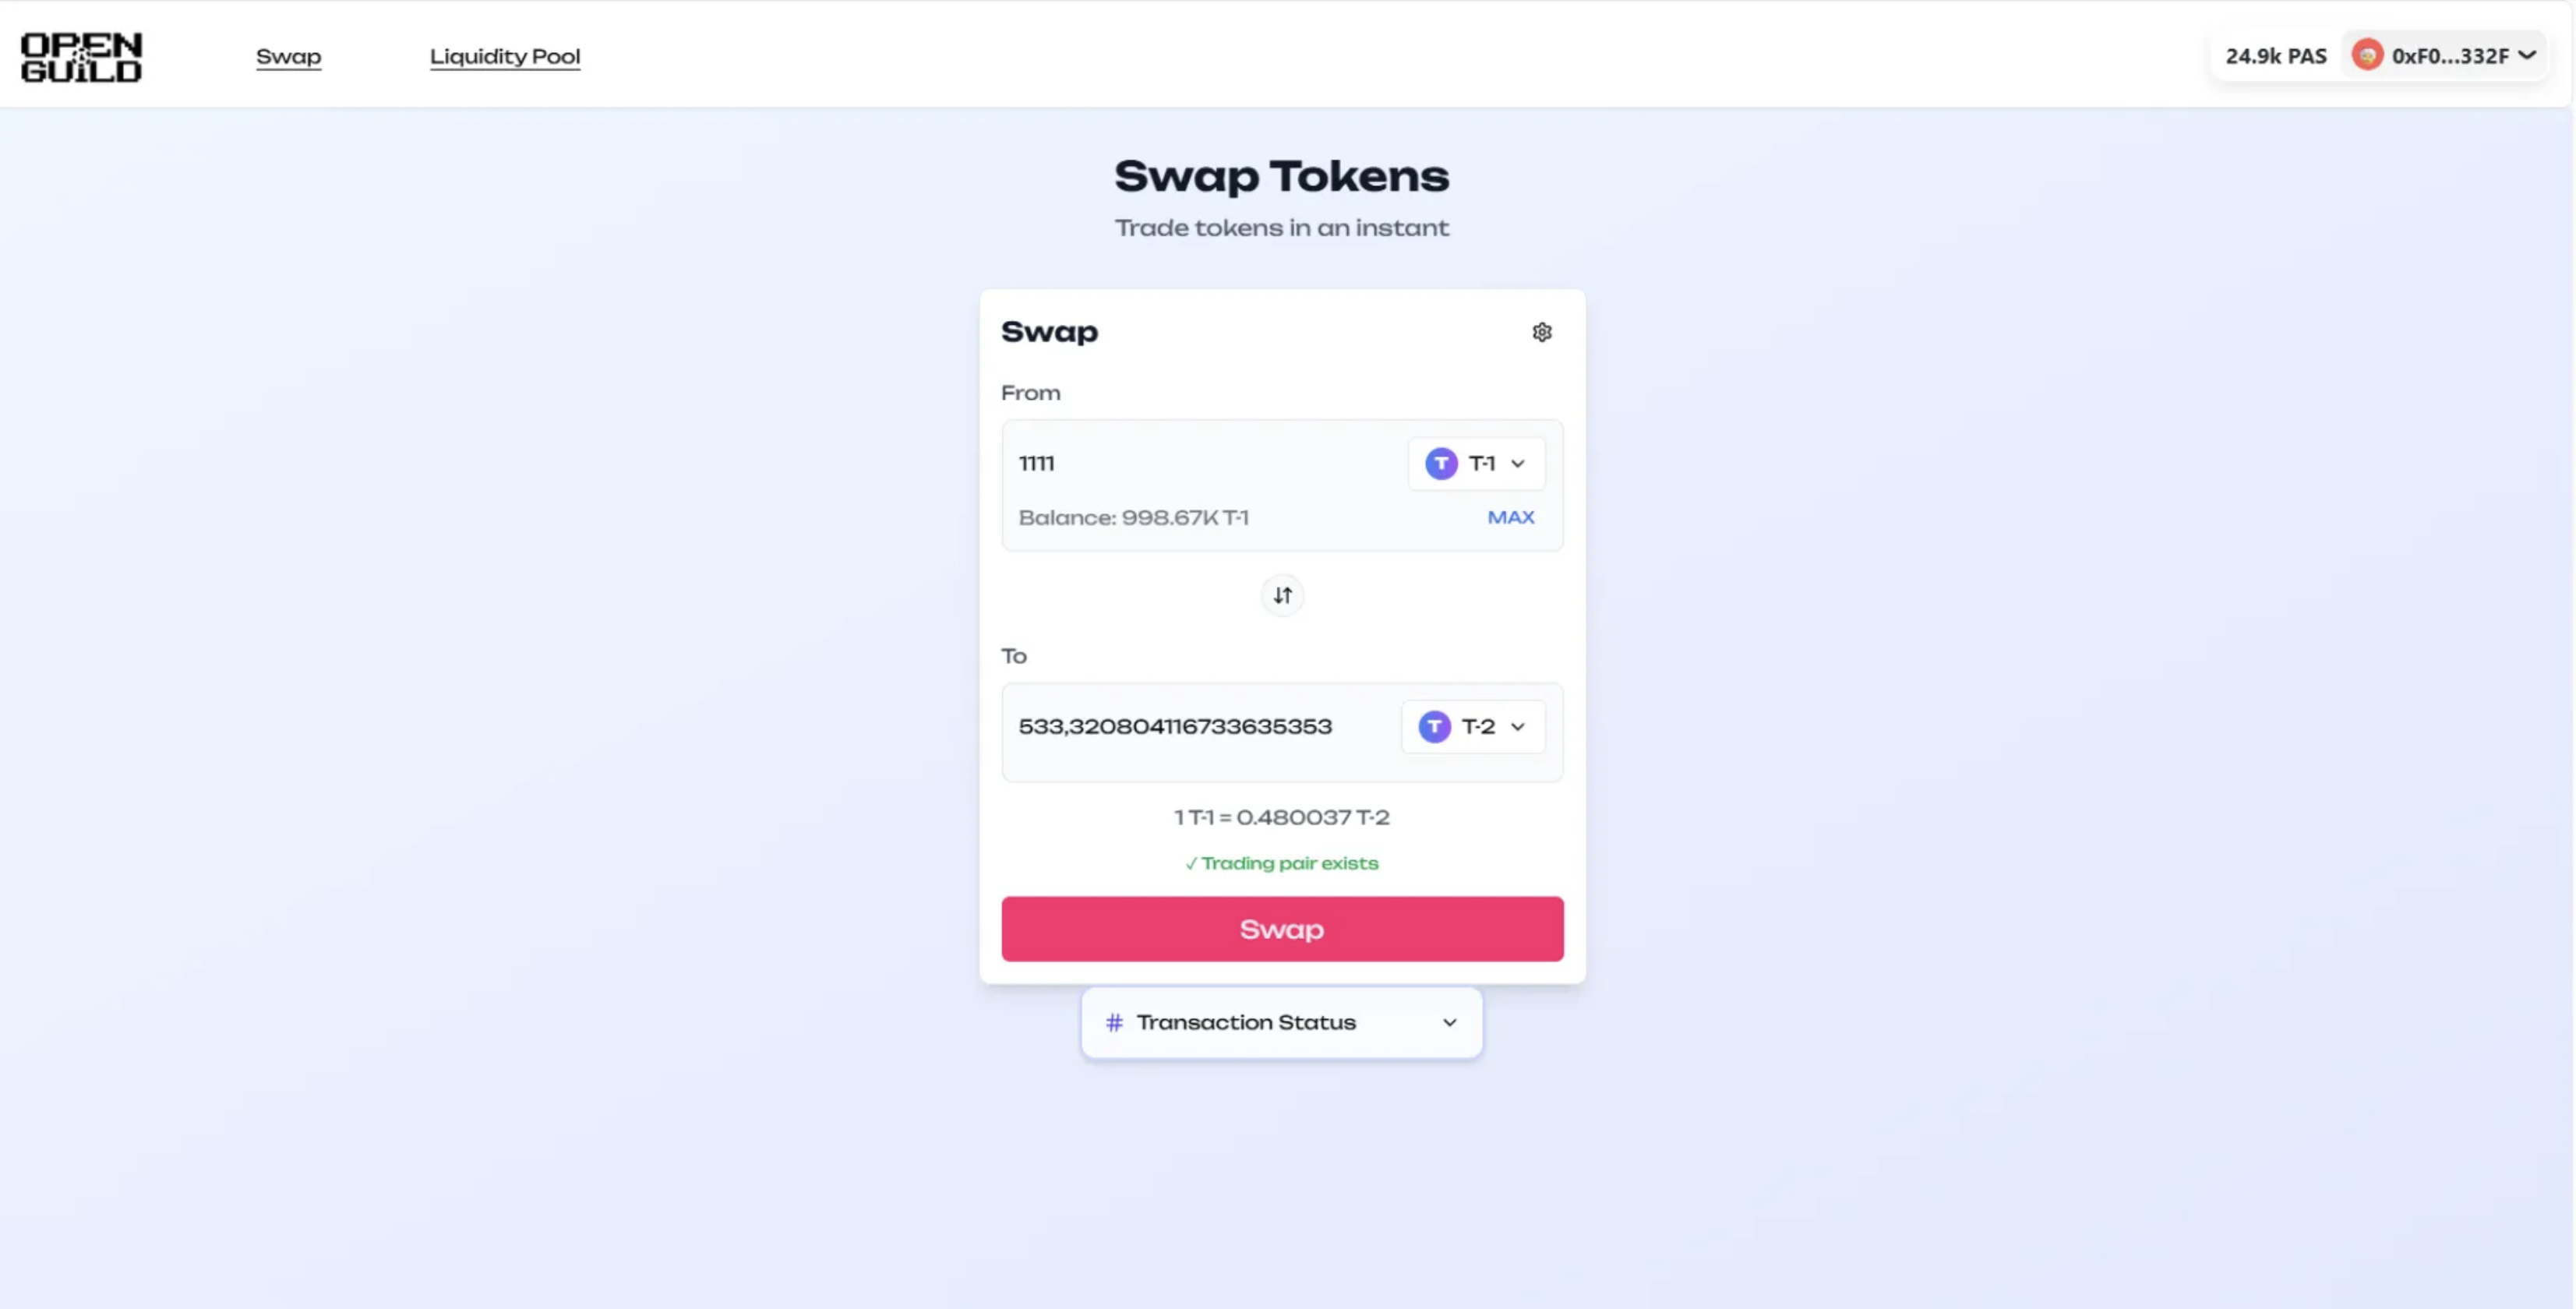
Swap Tokens: Execute trades using the UI.
Explore: Query and display information about all available liquidity pools.